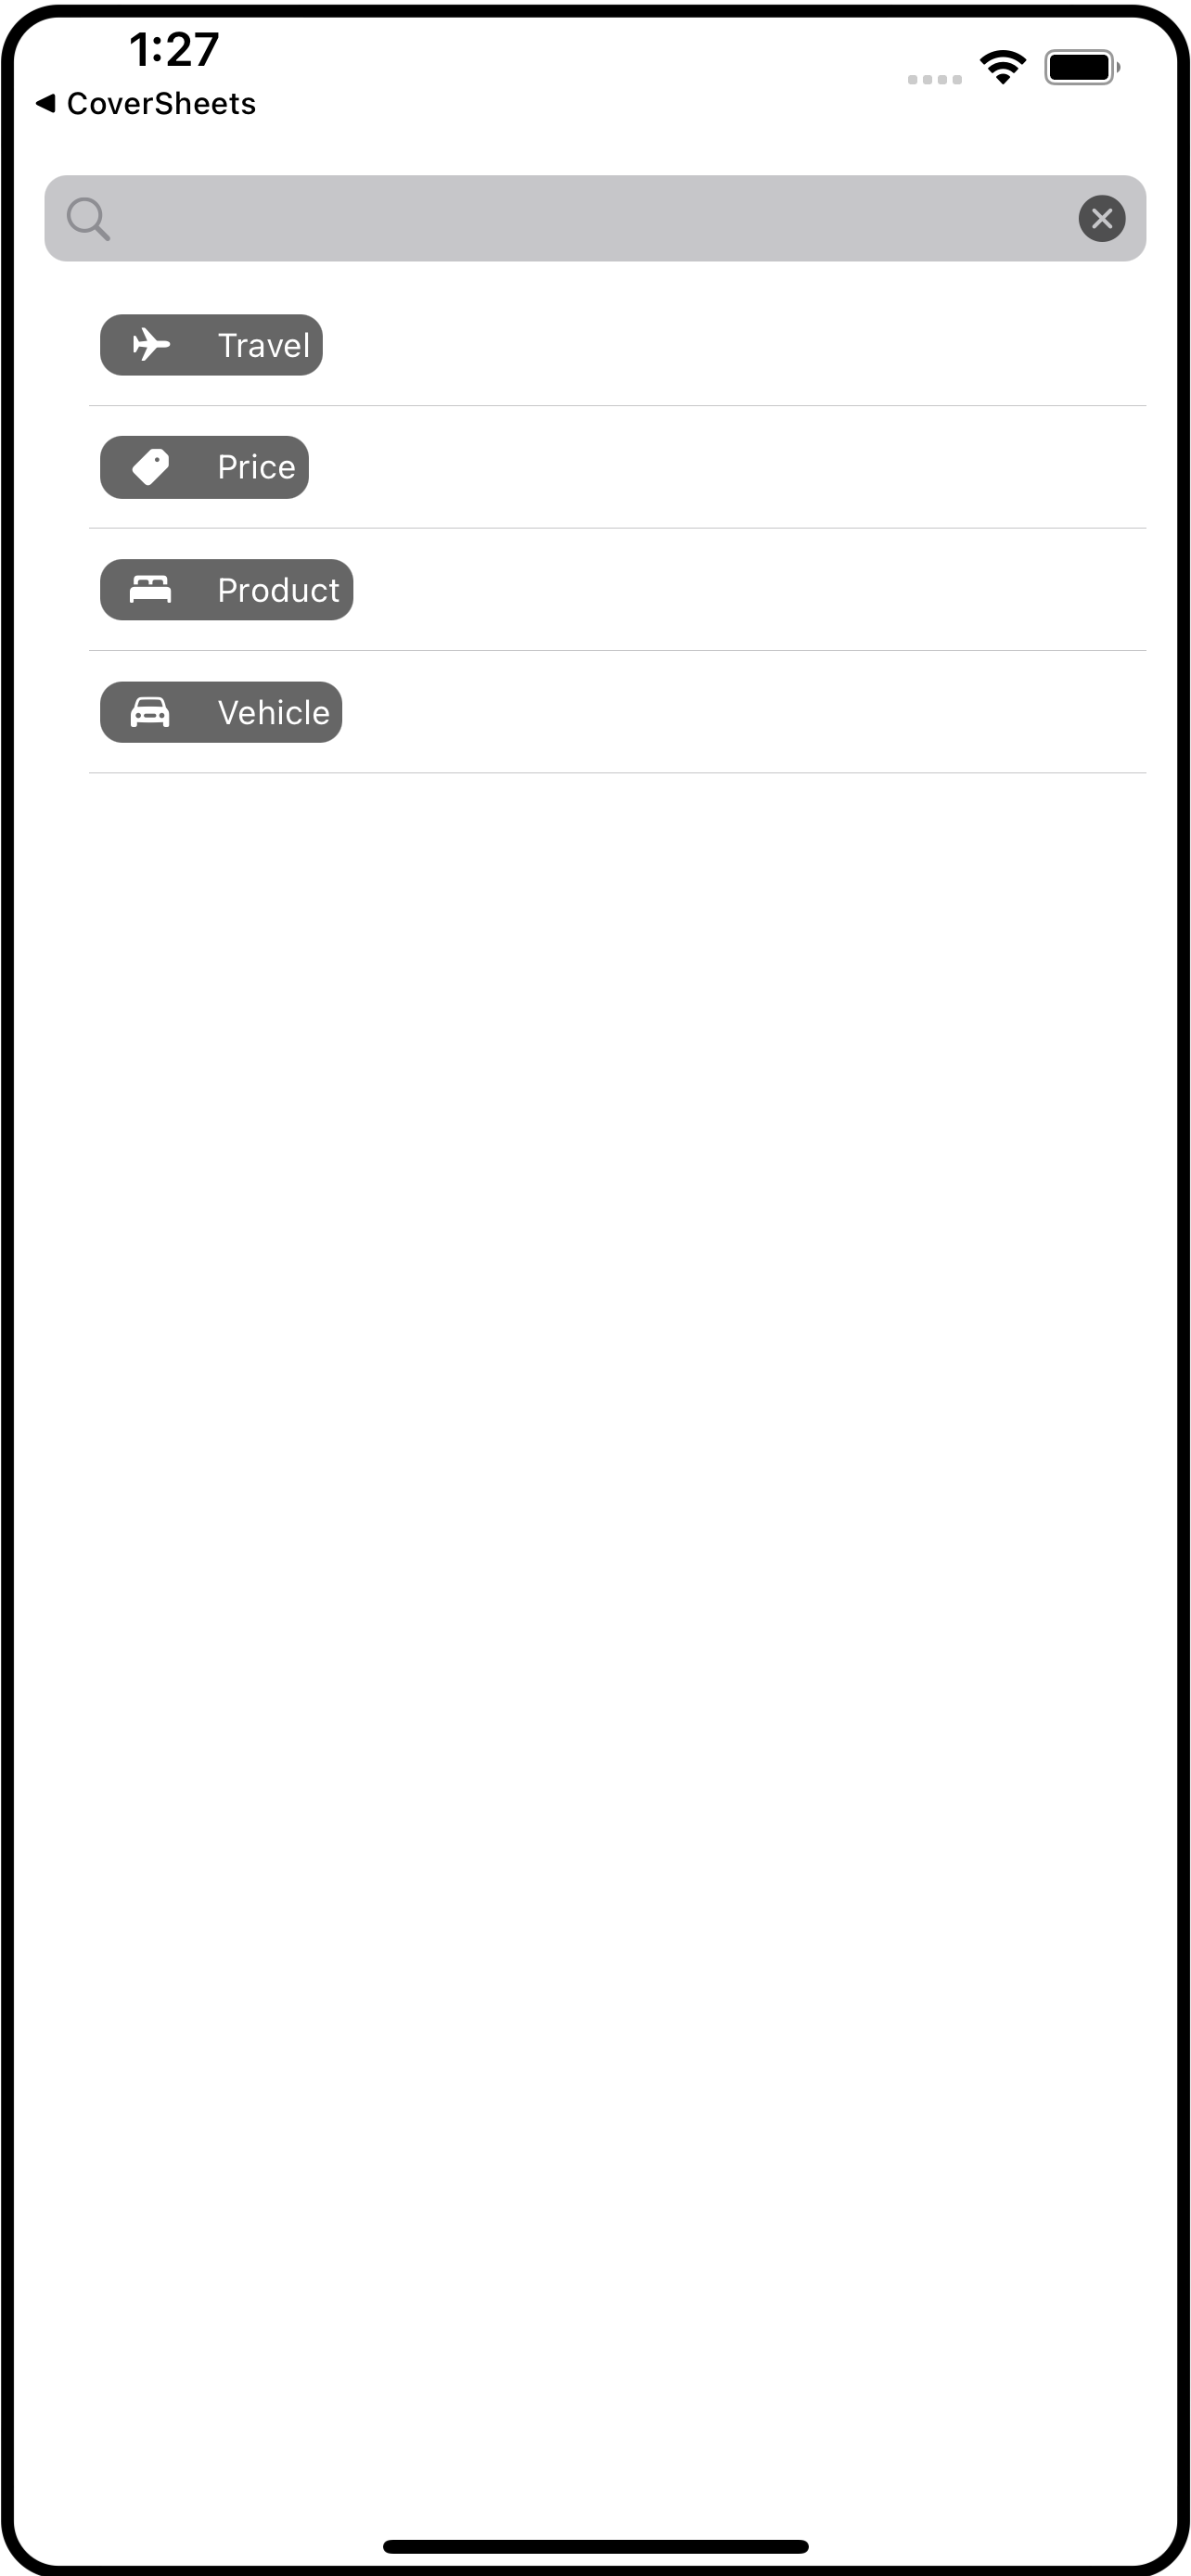
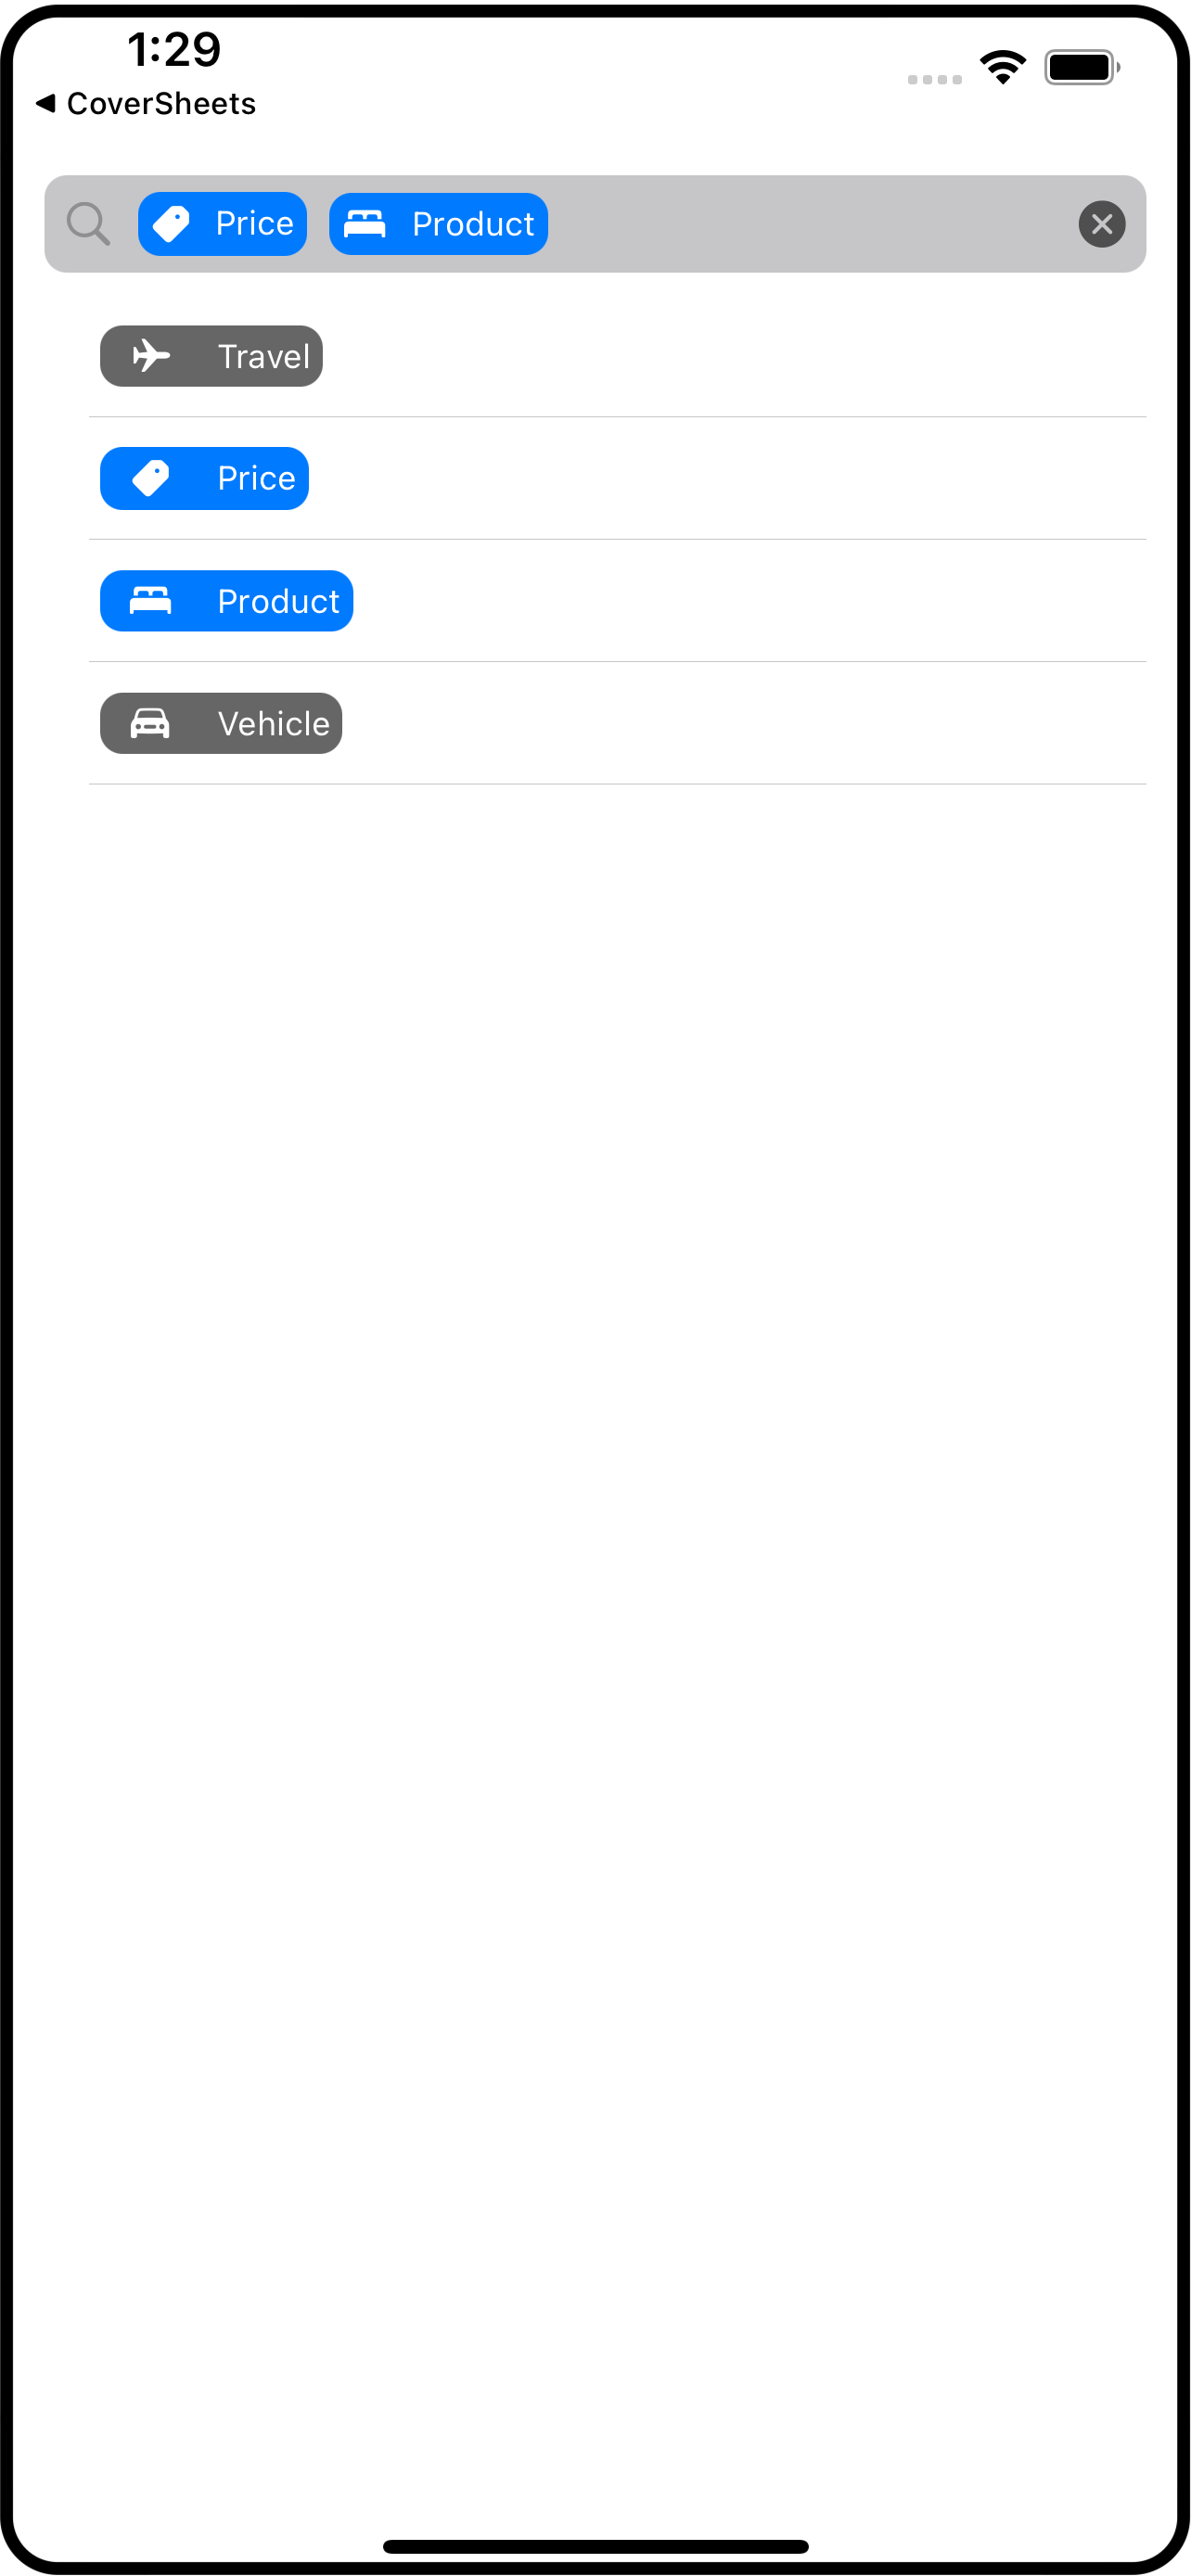
Filter Bar with SwiftUI
Sometimes you want do a search on categories or groups rather than on specific words or strings. I threw together this filtered search bar to help. You will have to combine the parts in ways that make sense for you, but at least you’ll have some pieces to use.
The idea is that you have a search bar-like area that gets filled with “filters” which I represent using image+title pairs (SwiftUI’s Label component).
Let’s begin with the model. Create a file called FilterModel.swift and place this definition of FilterData into it (you could put this into its own file, but it goes with the model):
struct FilterData: Identifiable {
    var id = UUID()
    var imageName: String
    var title: String
    var isSelected: Bool = false
}
Below that, in this same file, define FilterModel itself.
class FilterModel: NSObject, ObservableObject {

    // 1. normally you would get this data from a remote service, so factor that in if you use
    // this in your own projects. If this data is not static, consider making it @Published
    // so that any changes to it will get reflected by the UI
    var data = [
        FilterData(imageName: "airplane", title: "Travel"),
        FilterData(imageName: "tag.fill", title: "Price"),
        FilterData(imageName: "bed.double.fill", title: "Product"),
        FilterData(imageName: "car.fill", title: "Vehicle")
    ]

    // 2. these are the FilterData that have been selected using the toggleFilter(at:)
    // function.
    @Published var selection = [FilterData]()

    // 3. toggles the selection of the filter at the given index
    func toggleFilter(at index: Int) {
        guard index >= 0 && index < data.count else { return }
        data[index].isSelected.toggle()
        refreshSelection()
    }

    // 4. clears the selected items
    func clearSelection() {
        for index in 0..<data.count {
            data[index].isSelected = false
        }
        refreshSelection()
    }

    // 5. remakes the published selection list
    private func refreshSelection() {
        let result = data.filter{ $0.isSelected }
        withAnimation {
            selection = result
        }
    }
}
The model’s job is to provide the data for the UI to display. Here we have:
The
datais the list ofFilterDataitems. In a real app this list would come from a remote API server. For this example they are just hard-coded.The
selectionare thoseFilterDatathat have been picked by the user for the search. Notice that this is@Publishedwhich means the UI can observe changes to this variable. More precisely, the UI will not notice changes to the array itself, just whether or notselectionitself has changed.The
toggleFilterfunction adds or removes aFilterDatafrom the selection. It does this by building a new array from theFilterDatawhere an item’sisSelectedvalue istrue.The
clearSelectionfunction just sets everyFilterData.isSelectedin thedatatofalse.The
refreshSelectionfunction is private and is called fromtoggleFilterandclearSelection. It is the function that builds a newselection. Notice that when it setsselectionto the new value it does so within anwithAnimationblock. You’ll see how this is used later.
Now that we’ve got a model, let’s look at how a FilterData is represented visually. Create a new SwiftUI View file called FilterTag.swift and put this code into it:
struct FilterTag: View {
    // 1
    var filterData: FilterData

    // 2
    var body: some View {
        Label(filterData.title, systemImage: filterData.imageName)
            .font(.caption)
            .padding(4)
            .foregroundColor(.white)
            .background(
                RoundedRectangle(cornerRadius: 8)  // 3
                    .foregroundColor(filterData.isSelected ? .accentColor : Color.black.opacity(0.6))
            )
            // 4
            .transition(.asymmetric(insertion: .move(edge: .leading), removal: .move(edge: .leading)))
    }
}
This
structhas aFilterDataproperty because that is what it going to reflect, visually.The
bodyis just a SwiftUILabelwith some modifiers to give it rounded rectangle background.Notice that background color is dependent on the
isSelectedproperty of theFilterData.Finally, you can see the
transitionproperty. This is where thewithAnimationcomes into play. This transition will be applied when theFilterTagis appears (inserted into the display list) and when it disappears (removed from the display list). I picked a slide effect but you can do whatever you think looks nice, of course.
The last piece is the FilterBar itself, so go ahead and create a FilterBar.swift SwiftUI View file and place this code into it:
struct FilterBar: View {
    // 1
    @EnvironmentObject var filterModel: FilterModel

    // 2
    var body: some View {
        HStack {
            Image(systemName: "magnifyingglass")
                .foregroundColor(.gray)
            // 3
            ScrollView(.horizontal, showsIndicators: false) {
                HStack {
                    ForEach(filterModel.selection) { item in
                        FilterTag(filterData: item)
                    }
                }
            }
            Spacer()
            Button(action: { filterModel.clearSelection() }) {
                Image(systemName: "xmark.circle.fill")
                    .foregroundColor(Color.black.opacity(0.6))
            }
        }
        .padding(6)
        .background(RoundedRectangle(cornerRadius: 8).foregroundColor(Color.gray.opacity(0.5)))
    }
}
The
FilterBarneeds aFilterModelto work. I usually pass around models using@EnvironmentObjectbut you could also pass it in as a property and declare it with@ObservedObjectsince you want this UI to watch for changes to it (ie, theselectionproperty).The “bar” is an
HStackwith a magnifying glass image, a horizontally scrollable collection ofFilterTagviews, and a clear button.The scrollable portion is itself an
HStackbuilt using aForEachcomponent using the model’sselectionproperty. Becauseselectionis a@Publishedproperty of anObservableObject, SwiftUI automatically watches it. When it gets changed, SwiftUI will re-run thisForEach.
To see all this in action, let’s modify ContentView to display the list of filters in the model’s data and when on is tapped, make it selected (or not):
struct ContentView: View {
    @ObservedObject var filterModel = FilterModel()

    var body: some View {
        VStack {
            FilterBar()
                .environmentObject(filterModel)
            Spacer()
            List {
                ForEach(0..<filterModel.data.count) { index in
                    FilterTag(filterData: filterModel.data[index])
                        .onTapGesture {
                            filterModel.toggleFilter(at: index)
                        }
                }
            }
        }
        .padding()
    }
}
And there you have a different type of search bar - one that uses “filters” that represents subsets of the data.
I used a simple list to present the filter choices, but you might need something more complex. For example, you might have a section for pricing. Each item of that section might be prices from $1000 and up, from $500 to $1000, from $250 to $500, from $100 to $250, and below $100. But the filter bar would just show the same visual tag - its just so the user knows they are filtering by price. You could expand FilterData to include enums or whatever else you needed to capture all the information so it can be easily sent to your backend system to carry out the filtering (or if you have all the data already loaded, do it instantly).
I hope you find some use in this or that it sparks some ideas.